Polka Dot Bunny Tutorial
Polka Dot and Striped Bunnies
Turning a Plain Mold into a Spectacular Creative Candy
Just because a mold isnt detailed or doesn't have indentations that you can paint with colors doesnt mean you have to make a boring candy.
This bunny mold is perfectly smooth and this tutorial will showcase how to add design on the inside of the mold and make a rainbow of colors.
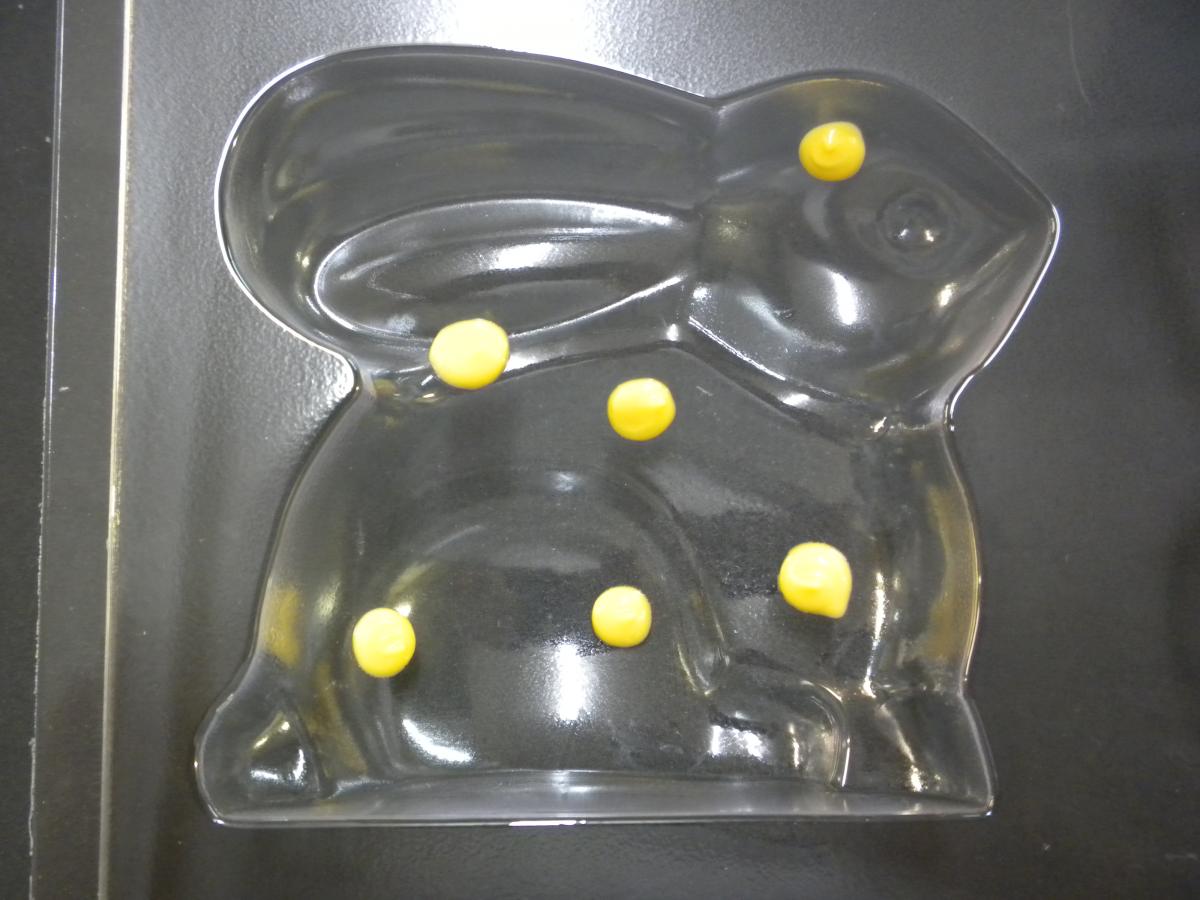
As always I use my Chocolate in a disposable decorating bag with a tiny portion of the tip cut off. I make a small dot of chocolate and swirl the tip of a toothpick around in it to make the dot as round as it can be.
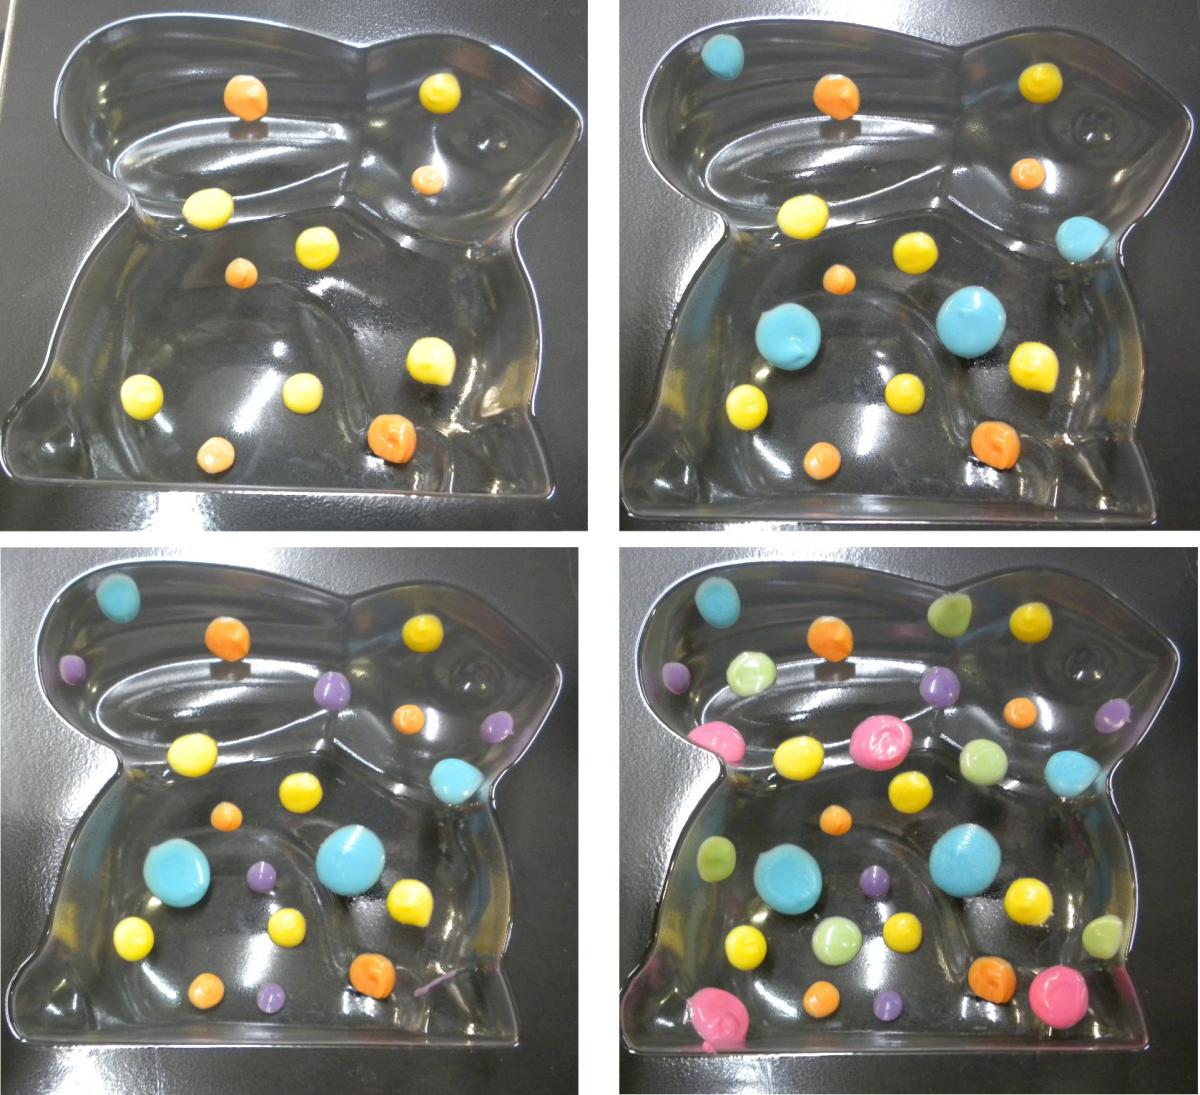
Use the same technique with the next 5 colors. now you have an amazing Rainbow of Polka Dots.
Start the Striped Bunny the same way. With a few dots here and there.
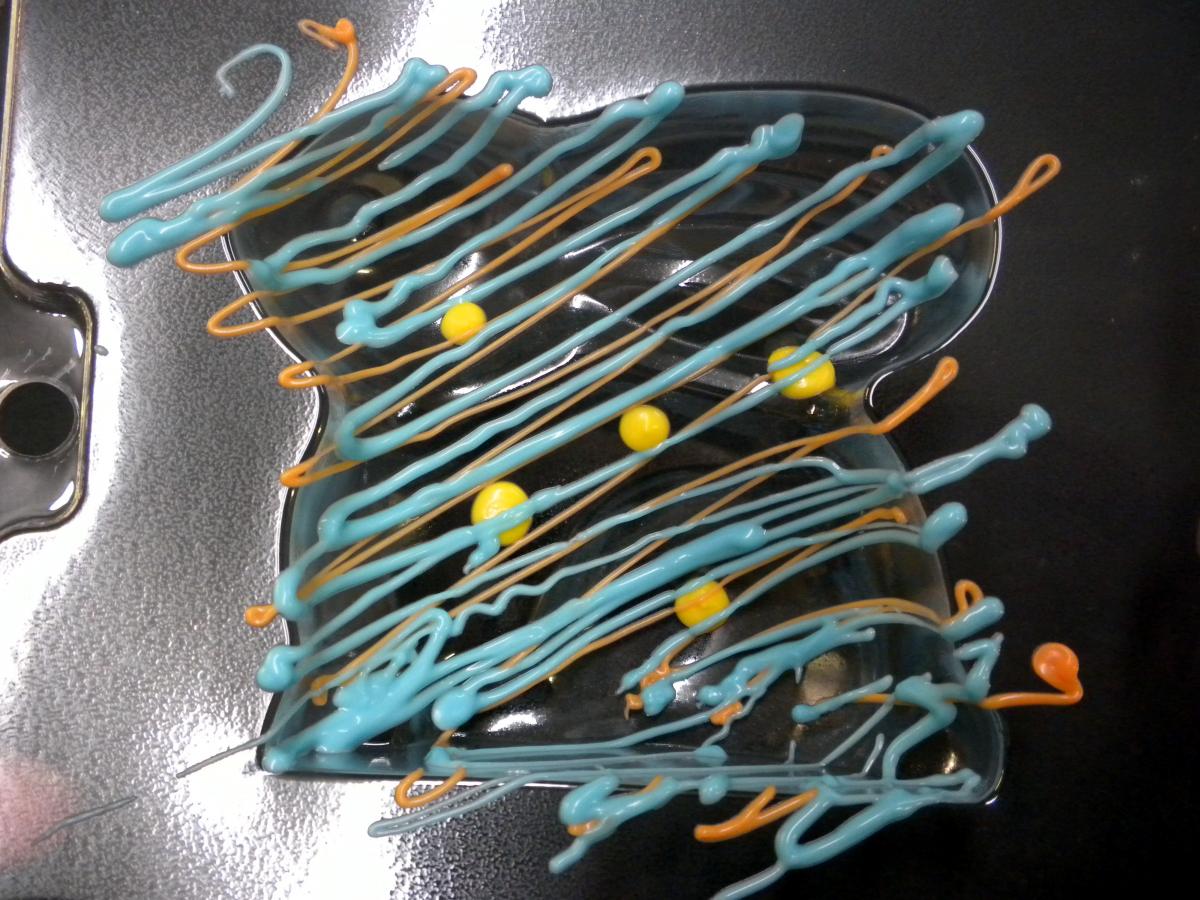
Now, instead of more dots. hold the bag high above the mold and let the chocolate drizzle back and forth over the mold.
I started with blue, and orange. Tap the mold on the table after each color to prevent the colors "hanging" and making an air bubble.
(You will be able to see what the bubbles look like in some of the pictures... I forgot)
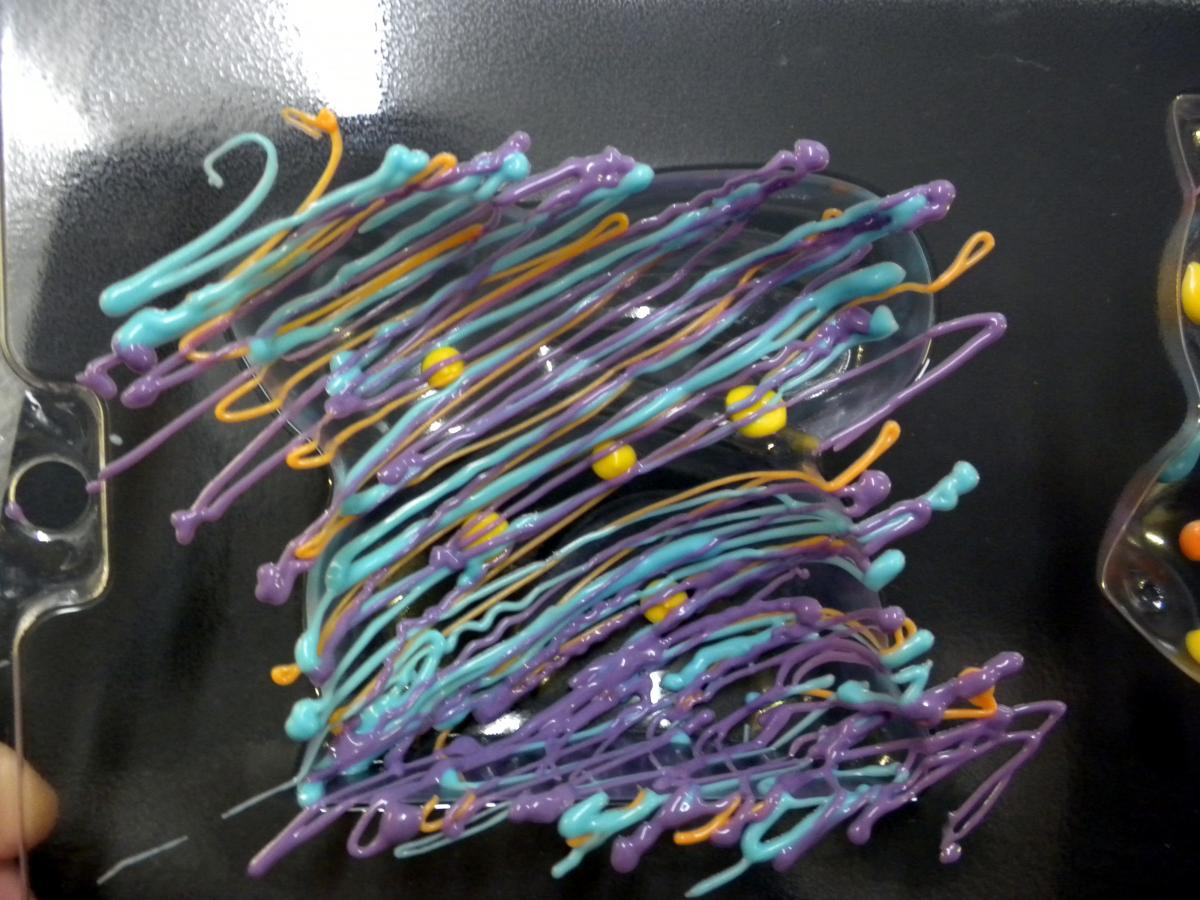
Repeat with the Purple, green, and lastly pink.
Each color will have to get heavier to make sure that it shows up between the other colors.
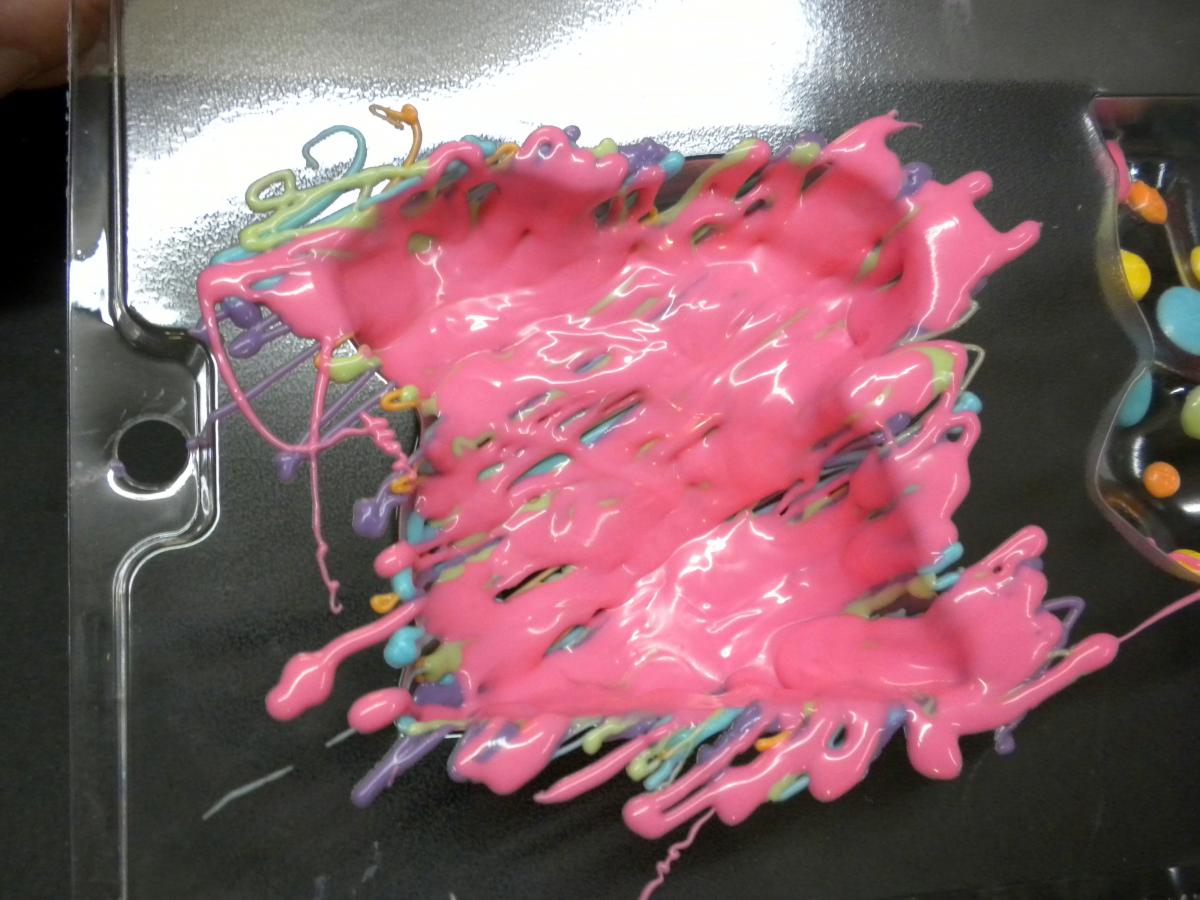
Notice how the pink covers most of the mold to make sure all the surface is covered.
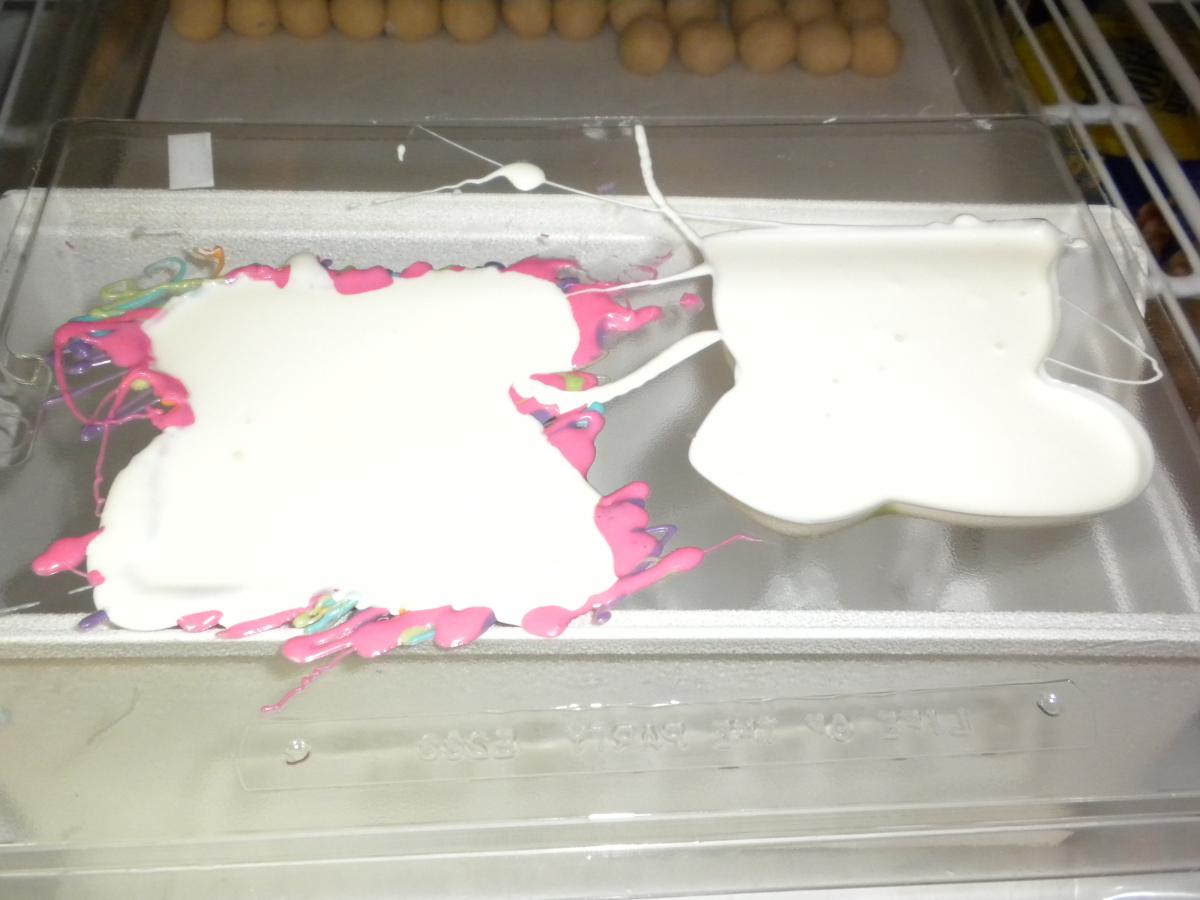
Fill the molds with your choice -White chocolate will make the most colorful design behind the dots but the striped bunny could be filled with milk chocolate or anything else.
It is much easier to under fill a chocolate mold than trim it after it is set up but don't worry if you do.
Let the molds set in the freezer. This will give the Chocolate a very glossy finish.
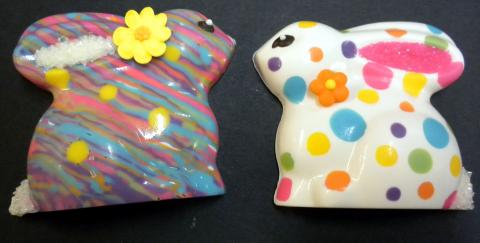
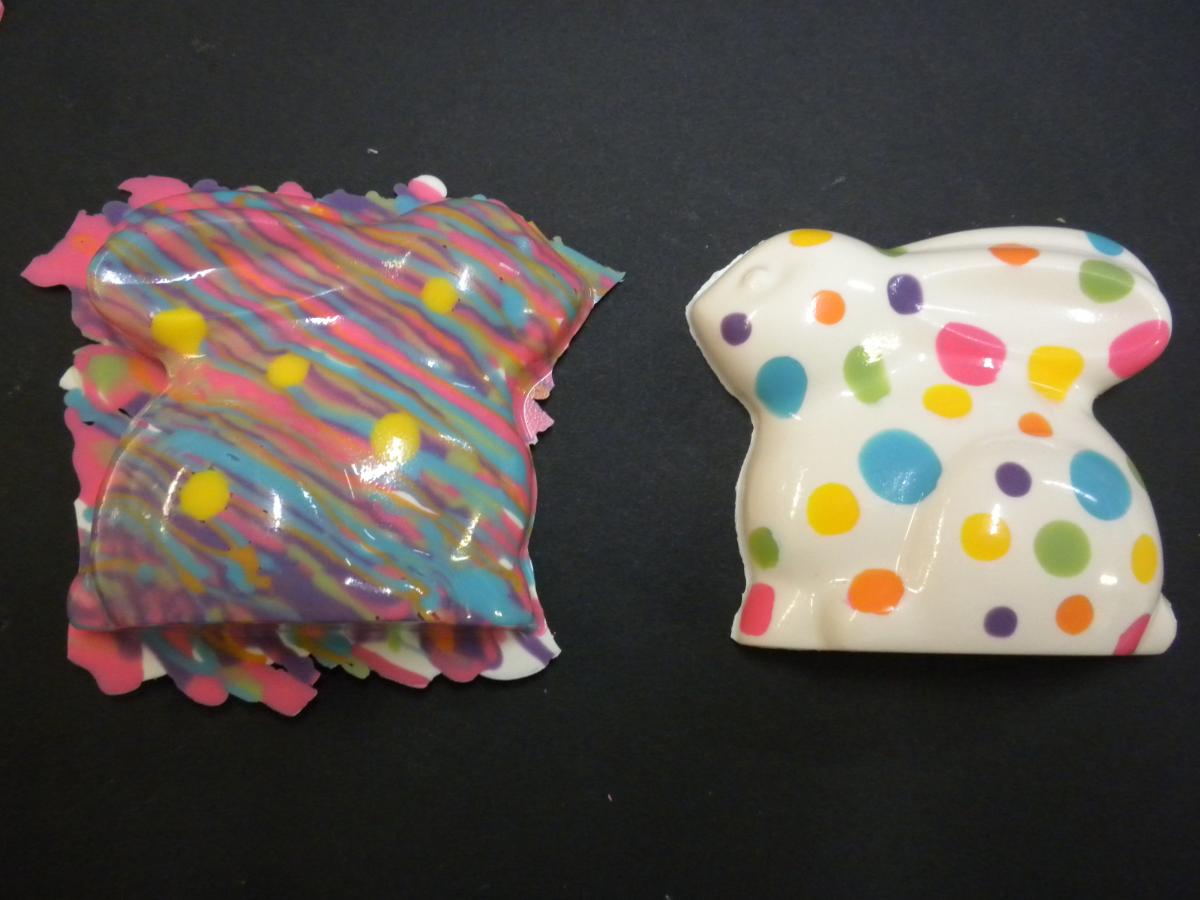
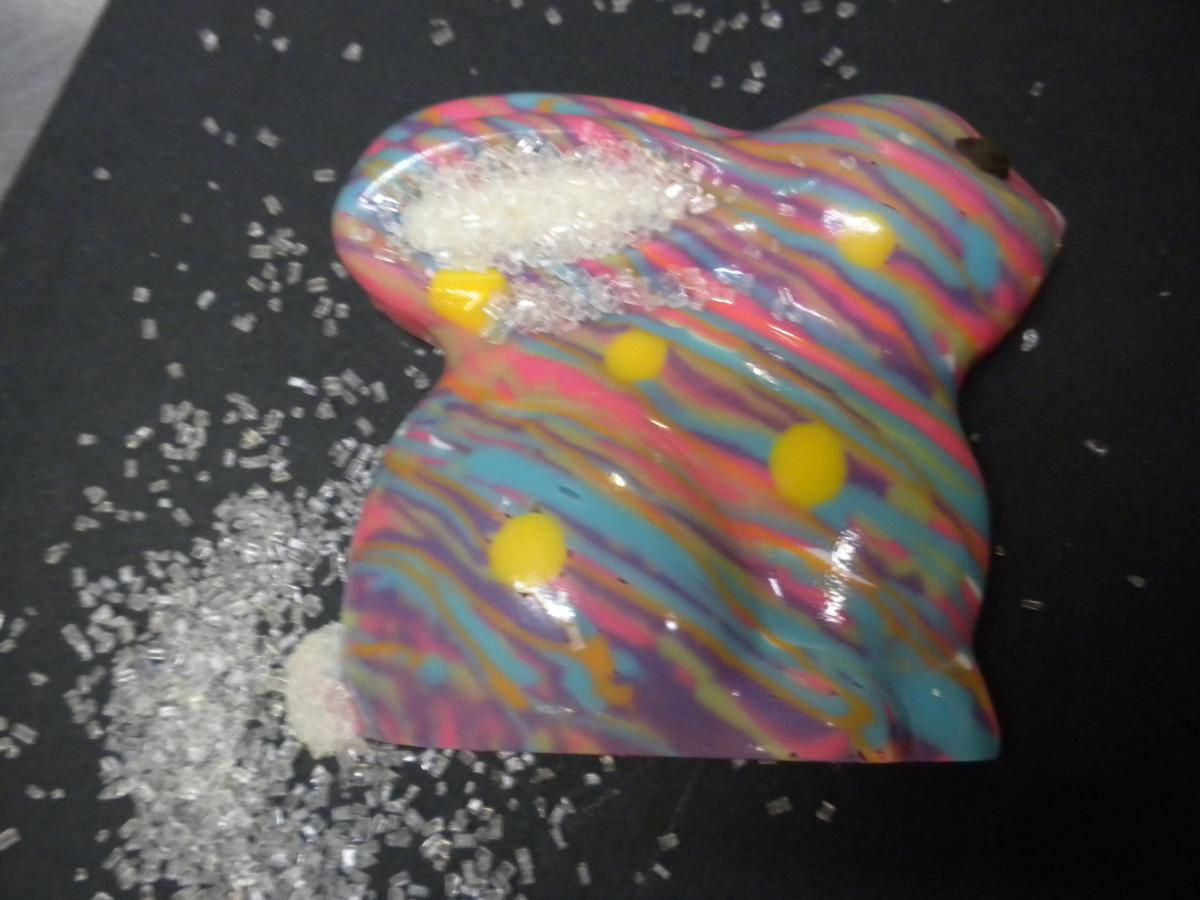
This is how the Bunnies will look when you remove them from the mold.
(you can see the air bubble that were trapped under the hanging drizzle when i for got to tap the mold in the top left corner around the yellow dot)
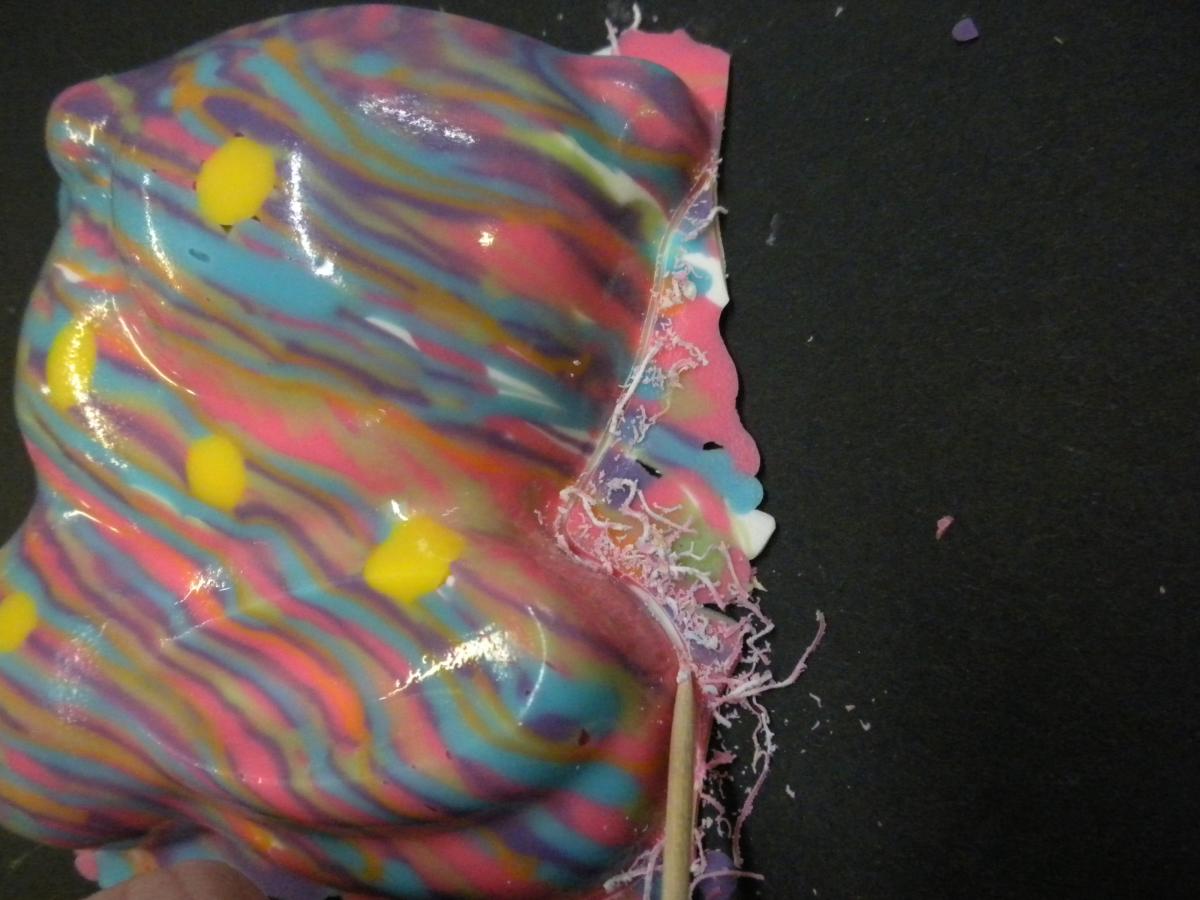
The drizzled Stripes will always have a lot of excess to trim.
I use a toothpick and make several passes around the perimeter.
This will keep the edge smooth and you won't dig into the shape like you can with a knife.
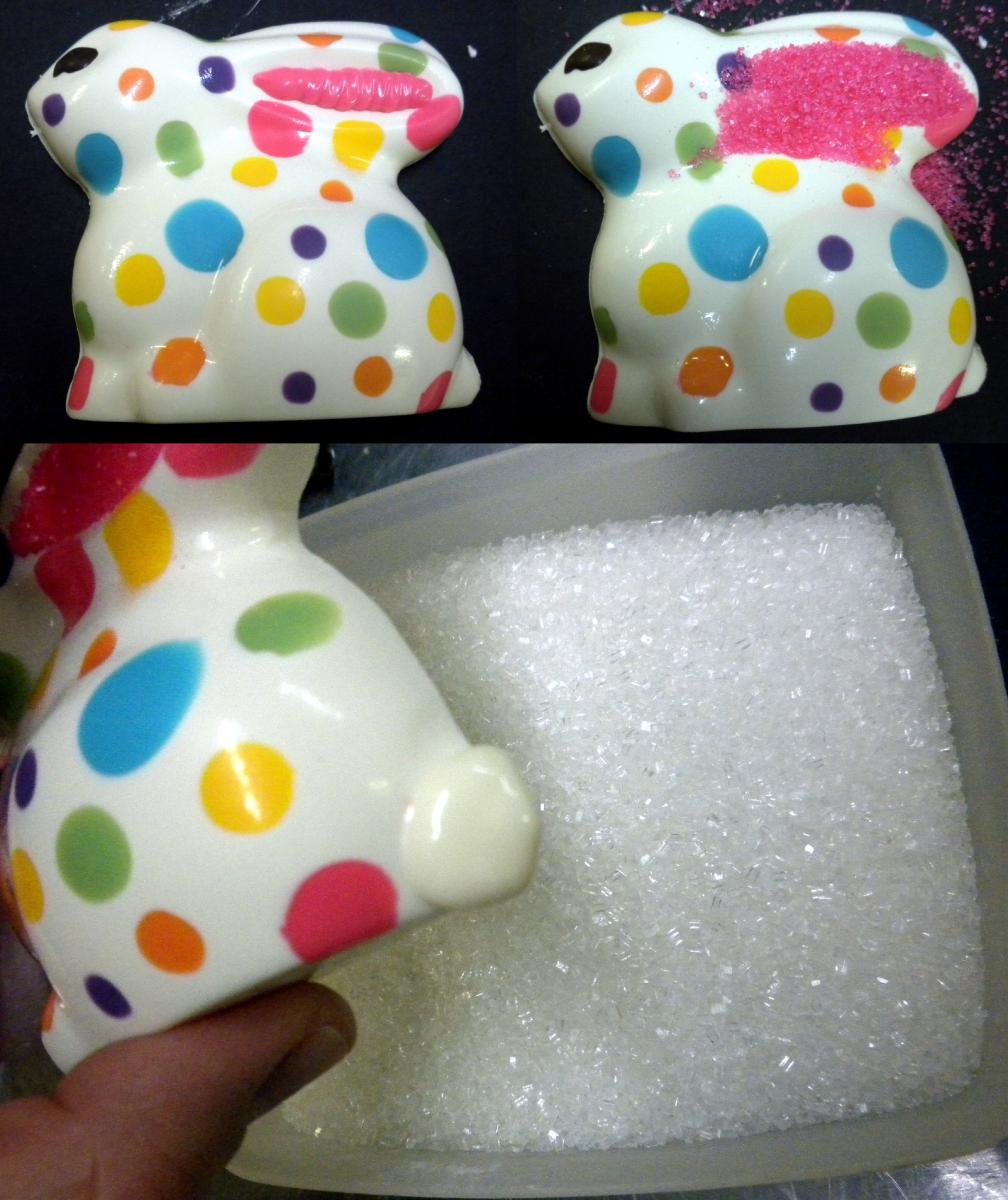
I used black chocolate to make an eye, and filled in the ear with pink. Sprinkle Sanding sugar over the wet chocolate to give it some sparkle.
You can put some white chocolate on the tail and dip it into Coarse Sugar to make it "fluffy"
I did the same things here for the striped.
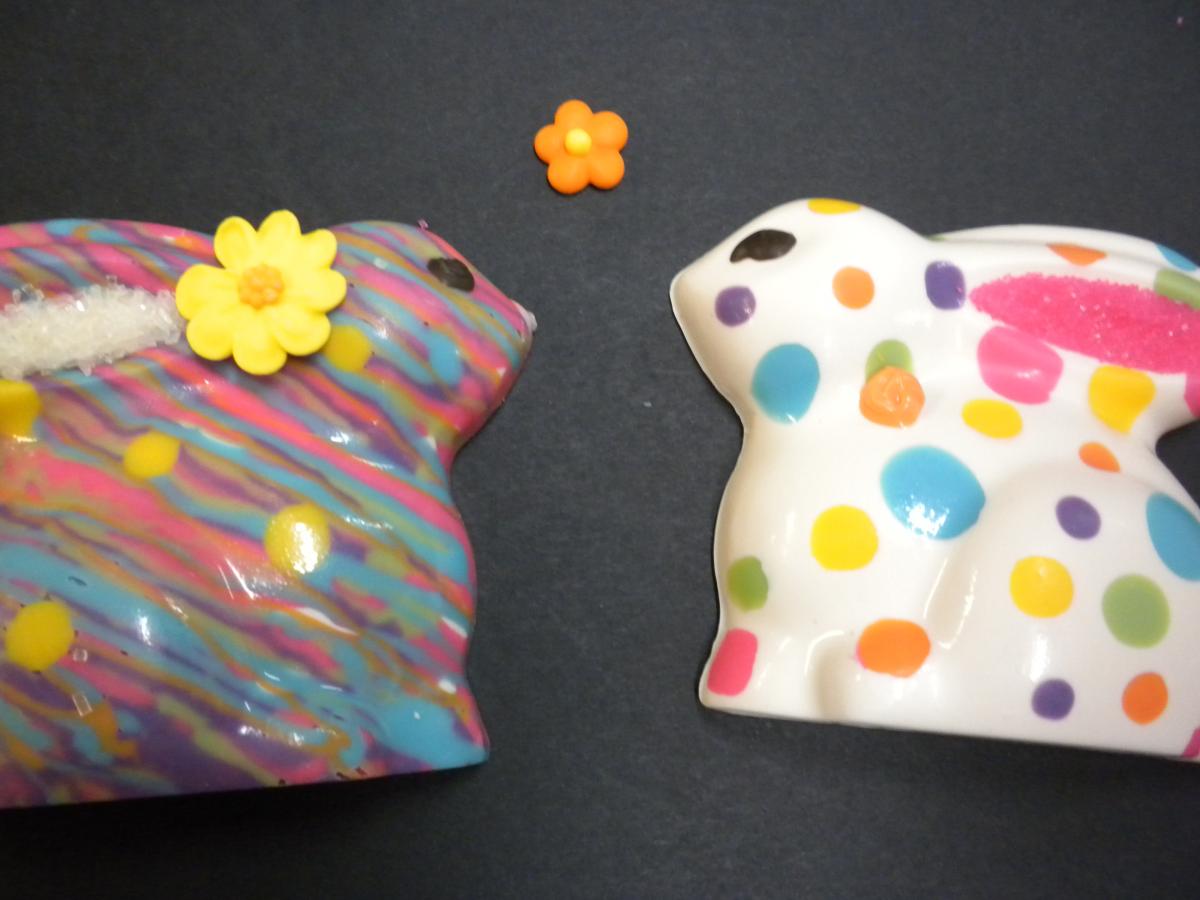
Put a dot of chocolate on the chocolate piece where you want to place accents and let it set.

For the final touch i put a tiny white dot on the eye. This gives it a more cartoon like look.
These are by far the easiest and most colorful easter candy i have made and I LOVE THEM!